Get Started With Machine Learning on Arduino | Arduino Nano 33 BLE Sense
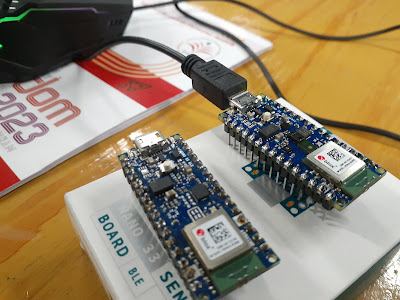
In this comprehensive tutorial, we will delve into the exciting world of deploying machine learning models on Arduino devices, specifically focusing on the Arduino Nano 33 BLE Sense.
Here is the list of steps for deploying a machine learning model on an Arduino Nano 33 BLE Sense:
- Arduino IDE Installation
- Installing the Mbed OS Core for Nano Boards
- Harvard_TinyMLx Library Installation
- Creating a Machine Learning Model Using TensorFlow in Google Colab
- Converting the Trained Model to TensorFlow Lite
- Encoding the Model in an Arduino Header File
- Deploying the ML Model on Arduino
Please follow this tutorial at 'https://support.arduino.cc/hc/en-us/articles/360019833020-Download-and-install-Arduino-IDE'.
2. Installing the Mbed OS Core for Nano Boards
Go to Arduino, and here, we need to navigate to Tools > Board > Board Manager.
Install "Arduino Mbed OS Nano Boards"
3. Harvard_TinyMLx Library Installation
Here we need to navigate to Tools > Manage Libraries
Install "Harvard_TinyMLx" Library
4. Creating a Machine Learning Model Using TensorFlow in Google Colab
Here, I am creating a simple weather prediction machine learning model using linear regression in TensorFlow. Temperature and humidity serve as the input features, while the weather summary is the expected output. Please note that this is a demonstration model, and the dataset used is sourced from Kaggle, with minor modifications made to exclude irrelevant fields for this project.
Note: This model is primarily for demonstrating machine learning integration in IoT, and it is a sample model rather than one optimized for accurate weather prediction.
5. Converting the Trained Model to TensorFlow Lite
6. Encoding the Model in an Arduino Header File
"Encoding the Model in an Arduino Header File" refers to the process of converting a machine learning model, typically in a format like TensorFlow Lite, into a specific format that can be embedded within an Arduino sketch. This process involves converting the model's numerical weights and architecture into a format that can be easily included in your Arduino code as a header file (.h).
This header file essentially contains the model's data in a way that allows the Arduino sketch to use it for inference, without the need for external dependencies or separate model files. By encoding the model in this format, you can ensure that your Arduino project remains self-contained and can make predictions or perform tasks based on the machine learning model directly from the Arduino board without relying on external resources. It's an important step when deploying machine learning models on resource-constrained devices like Arduino.
7. Deploying the ML Model on Arduino
Download and save the 'model.h' file to the same directory as your Arduino sketch. In this code, I have provided sample temperature and humidity values for prediction. You can alternatively read these values from a sensor to make real-time predictions.
Github - Machine_Learning_Weather_Prediction
Now we can see the output in the serial monitor like this.


Comments
Post a Comment